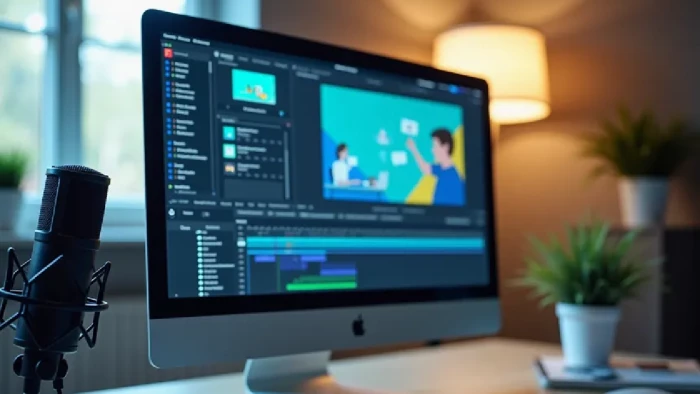
Whether you work in marketing, education, customer support, design, or freelancing, screen recordings can often save time compared to long emails or endless calls. You do not need to write complicated instructions step by step. Instead, you can simply show what is happening on your screen. It feels faster, more personal, and much easier for viewers to understand. That is why screen recording tools are now used everywhere.
Are you working on onboarding tutorials, running software demos, making bug reports, or client presentations? It does not matter. Being able to screen record will come in handy. Keep reading to learn when screen recording works better than text or meetings and what features matter in a good screen recorder. We will also explain how do I screen record workflows using Movavi and create professional-looking tutorials.
_1779885683.webp)
There are many situations where a screen recording is simply more effective than typing explanations. Imagine trying to explain a website bug through email. You may need several screenshots, arrows, and paragraphs of text. A 30-second recording instantly shows the exact issue. The same applies to tutorials and product demos. People understand visual instructions faster because they can see every click, menu, and action in real time.
Screen recordings are especially useful for software tutorials, product walkthroughs, website feedback, bug reports, team training, client presentations, and many more. A short video can also reduce unnecessary meetings. Instead of scheduling a call across different time zones, you can record your explanation once and share it instantly.
For freelancers and agencies, this is especially helpful when sending client reports. You can walk clients through analytics dashboards, website updates, design revisions, or SEO changes. There is no need to waste your time on creating a massive written document.
Today, companies also use screen recordings for staff training videos, onboarding processes, remote collaboration, SaaS product demos, internal documentation, and even AI knowledge base content libraries where employees can quickly access visual instructions when needed.
Not all screen recording software is the same. A basic recorder may capture your screen. However, professional tutorials and demos usually require more features. A good tool should be easy to use and offer enough flexibility for you to perform different tasks. Here are some important features to look for:
This is why many users choose Movavi Screen Recorder. The tool combines beginner-friendly controls with useful professional features. All these make it suitable for tutorials, online meetings, product demos, and business reporting.
Getting started with screen recording is easier than many people expect. Here is a simple step-by-step guide for creating your first recording using Movavi Screen Recorder.
Good screen recordings are not just about software. Presentation style also matters. Here are some practical tips that can instantly improve your videos.
Many people start recording without preparation and end up with long, confusing videos. Before recording, quickly outline the following points:
Even a rough plan helps your recording feel more organized.
Long recordings often lose the viewer's attention. If possible, keep tutorials under 10 minutes, break large topics into smaller videos, and focus on one goal per recording. Shorter videos are easier to watch and easier to revisit later.
A messy desktop can look unprofessional. Before recording, close unnecessary tabs, hide personal notifications, remove unrelated files, and use clean browser windows. This is especially important for client-facing videos.
Many people talk too fast during recordings. Pause between steps and explain actions clearly. Your viewers may be completely unfamiliar with the software or workflow.
Cursor highlights and zoom features help viewers follow your actions more easily. This is particularly useful for software demos and tutorials involving detailed interfaces.
Poor audio quality can ruin an otherwise good tutorial. Before starting, check the microphone volume, reduce background noise, use headphones if needed, and record a short test clip. Clear audio makes videos feel much more professional.
Screen recording has become an essential communication tool for businesses, freelancers, educators, and remote teams. In many cases, a quick video explanation is far more effective than long emails, written instructions, or unnecessary meetings for everyday uses.
The right software can make the process simple and professional. Movavi Screen Recorder and similar tools can help users create tutorials, product demos, client reports, staff training videos, and SaaS product demos without needing advanced video editing skills. With a bit of planning, clear audio, organized screen recorder settings, and the right presentation style, you can create a truly nice screen recording that saves time and makes your work easier for others to understand.
Seedance 2.5, MiniMax H3, and Wan 3 all promise something bigger than the old pr...
Grace Howard2 months ago
Anthropic’s chatbot is attracting more consumer attention, but ChatGPT still rem...
Samuel Osei3 months ago
Meta is testing a redesigned Creator Studio app with AI tools for content planni...
Benjamin Clark3 months ago
China's humanoid robots are stepping out of the lab and onto the factory floor,...
Sandra Campos3 months ago
Social media platforms are beginning to give users more direct control over the...
Peter Woods3 months ago

Google has officially released Android 17, bringing a wider set of multitasking...
Noura Belkacem3 months ago
Discussion